
 Data Structure
 Networking
 RDBMS
RDBMS Operating System
 Java
Java MS Excel
 iOS
iOS HTML
HTML CSS
CSS Android
 Python
 C Programming
 C++
C++ C#
C# MongoDB
 MySQL
MySQL Javascript
 PHP
PHP Physics
 Chemistry
 Biology
 Mathematics
 English
 Economics
 Psychology
 Social Studies
 Fashion Studies
 Legal Studies
- Selected Reading
- UPSC IAS Exams Notes
- Developer's Best Practices
- Questions and Answers
- Effective Resume Writing
- HR Interview Questions
- Computer Glossary
- Who is Who
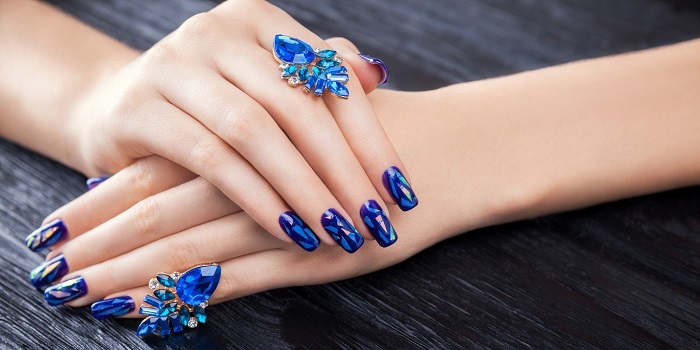
How to Create a Holographic Nail Art Design?
A distinctive and eye-catching method to jazz up your manicure is with holographic nail art. You can give your nails a multi-dimensional, rainbow impression by applying specialized holographic powders or paints. You'll need a few specialized tools and methods for the procedure, but with little time and expertise, you can produce amazing and distinctive holographic designs on your nails that will attract attention. We'll look at how to make a holographic nail art design in this tutorial.
Step by Step Instruction
One of the coolest fashion trends right now is holographic nails, and for good reason. They are dazzling, vibrant, and so lovely! Holographic nail powder is one of the best ways to obtain them, although not everyone like playing with powder. Fortunately, there are alternative methods to achieve holographic nails, like holographic nail art foil and, in a pinch, holographic cellophane. Whatever approach you go with, you'll undoubtedly produce something that will impress all of your friends!
Using Nail Powder
Following are the major steps −
Step 1
Purchase some holographic nail polish. It is available online and in stocked beauty supply stores. It could also be referred to on the label as "hologram mirror powder." Select a silvery or iridescent material to achieve the holographic effect.
Step 2
Start with a basecoat and finish with your preferred colour when doing your manicure as normal. After a light foundation coat, add your preferred colour. Any colour you choose to select will produce a somewhat distinct appearance. The hologram effect will be more pronounced the darker your base colour is. Consider choosing silver as your base colour if you have never painted your nails before. In this manner, it will be less obvious if you unintentionally leave any holes in the powder.
Step 3
When the non-wipeable gel top coat becomes rubbery but not tacky, apply another layer. The powder will adhere to it as a result of this.
Step 4
Beginning at the bottom of your nail and working your way up, gently tap the powder on. Gently flick your brush downward as you tap the powder on. You can apply the paint with a tiny brush, a unique applicator for nail art, or even one of those foam eye makeup brushes.
Step 5
Dust off extra powder with a gentle brush. Start at the base of your nail and gently work your way toward the tip in one motion with the brush. This will help the powder lie more smoothly and get rid of any extra powder. To get rid of any powder that might have gotten attached to your skin, make sure to sweep to either side of your nail. The ideal brush for this would be a kabuki brush or a soft, fluffy eyeshadow brush.
Step 6
Don't forget to top off with a non-wipeable coat. Make careful to move it down the sides as well as across the top of your nail. Your manicure will be sealed and kept from peeling by doing this.
Step 7
Use a UV lamp to cure your manicure. It should only take a minute or so. Your manicured nails are now ready to be shown.
Using Holographic Foil
Step 1
Purchase some holographic foil. Online or in a well-stocked beauty supply store, you can purchase specialized holographic or "spectrum" foil made specifically for nail art. Any retailer that sells gift wrap will also have some holographic cellophane.
Step 2
As usual, begin your manicure with a base coat and your preferred colour. Any colour that you choose may be used. If you're new at nail art, you might choose to use silver as your base colour. This will make the gaps less noticeable if your foil shreds or rips as you are applying it.[9] Apply a top coat thereafter. To get a uniform and flawless finish, use light coats of nail polish.
Step 3
With a pair of manicure scissors, cut the foil into pieces the size of your nails. Although they don't need to be flawless, aim to get them as close as you can to the proper size. Although you may always clip off any extra foil from the tip of your nail, the breadth is more crucial than the length.
Step 4
Apply a thin layer of foil adhesive with paint. To avoid the adhesive drying out before you can get to it, it could be a good idea to apply just one nail for the time being. If particular foil adhesive is not available, you can paint on top coat as a substitute. The adhesive needs 30 to 60 seconds to get sticky. It might require a lot of top coats if you use it.
Step 5
With the foil side up, press it into your nails. Check to verify if the holographic cellophane is identical on both sides if you plan to use it. If it's not, make sure to push it into the adhesive or top coat with the holographic side facing up. Then, place the foil piece's base on the base of your nail and press. The foil should dangle over the tip of your nail if there is any extra.
Step 6
With a staff made of orange wood, gently smooth the foil down. This will smooth down any creases or air bubbles and aid in adhering it to your nail. A lot of pressure could cause it to rip, so be careful.
Step 7
Make it clean. When using foil, make sure that it is thin enough for you to be able to peel off any extra or overhang. Use a pair of nail clippers to remove any extra cellophane from the tip of your nail if you're using it.
Step 8
Put on a topcoat to complete. Use a top coat made especially for nail art if at all possible.
Using Holographic Cellophane
Step 1
Get yourself some holographic cellophane. It is available almost anywhere that sells gift wrap. You might purchase some iridescent cellophane if you like something that resembles an opal.
Step 2
Cellophane should be cut into tiny, ragged shapes. Try to get several varied sizes and shapes; this will produce a more "natural" and impromptu effect similar to opals and broken glass. However, make sure the shapes are considerably smaller than your nails. To produce the "shattered" appearance, you will piece them together on each nail. Stick your cut shapes into the double-sized tape that has been applied to your table. To ensure that they are standing up, only the edges should touch the tape. This will make it simpler to grab them.
Step 3
Put on the base and top coats. You can use all of your creativity at this point. Consider using silver nail polish if you want something that resembles glass. Try nude if you want something that resembles an opal (this looks fantastic with iridescent nail paint). Try black if you want something dramatic.
Step 4
Put on the final coat. For the time being, it could be wise to only paint a few nails or even one hand. Make sure you use a conventional top coat rather than a quick-drying one; otherwise, you might not have enough time to place the pieces on a surface.
Step 5
Start gluing the pieces of cellophane on your nail. To attach the cellophane pieces to your nail, grab them with tweezers and place them there. The pieces can be positioned anywhere you like—closely or far apart—but don't let them touch. Overlapping them will result in seams, which will add bulk. If some of the bits extend past the tip of your nail, don't be concerned.
Simply paint more on if the top coat dries too quickly.
Aim to get the pieces in the correct location the first time; otherwise, you risk creating "ripples."
Don't obsess on perfection. The broken appearance is meant to appear random.
Step 6
Complete the remaining nails, then tidy up. Once you've finished, take a pair of nail clippers out and use them to snip any extra foil that may have reached your fingernail tips.
Step 7
A top coat will protect your nails. Be careful to sweep some top coat over the very tips of your nails as well. By doing this, the polish won't start to peel.
Conclusion
A fun and inventive approach to improve your manicure is to create holographic nail art. You may create a multi-dimensional, rainbow look on your nails with the appropriate tools and methods. Always begin with a clean, prepared nail surface, apply a top-notch holographic powder or polish, then set your design in place with a topcoat.
Create an own and customized holographic nail art style by experimenting with various colours and designs. With time and effort, you may produce magnificent holographic designs that will astound those around you.

103 Views
