
 Data Structure
 Networking
 RDBMS
RDBMS Operating System
 Java
Java MS Excel
 iOS
iOS HTML
HTML CSS
CSS Android
 Python
 C Programming
 C++
C++ C#
C# MongoDB
 MySQL
MySQL Javascript
 PHP
PHPPhysics
Chemistry
Biology
Mathematics
English
Economics
Psychology
Social Studies
Fashion Studies
Legal Studies
- Selected Reading
- UPSC IAS Exams Notes
- Developer's Best Practices
- Questions and Answers
- Effective Resume Writing
- HR Interview Questions
- Computer Glossary
- Who is Who
How to convert multiple columns to rows in Excel?
You may be curious how it is going to help if we take data that is organised in many columns and turn it into rows. It is preferred, in general, for each row of data to be analogous to a record and to contain a single data point. The columnar data may be a mess, with various properties scattered across several columns. Different people will look at the data in different ways. For instance, some people construct spreadsheets in Excel with the primary fields arranged in a horizontal fashion.
Some people prefer to have the data reversed horizontally across columns. Because of these preferences, you may find yourself in a situation where you need to switch the data in Excel.
Columns to rows in excel
In Excel, to convert any Columns to Rows, first select the column which we want to switch and copy the selected cells or columns. To proceed further, go to the cell where we want to paste the data, then from the Paste option, which is under the Home menu tab, select the Transpose option. This will convert the selected Columns into Rows. We can also use the short cut keys Alt + H + V + T, which will directly take us to the TRANSPOSE function.
Let’s understand step by step with an example.
Step 1
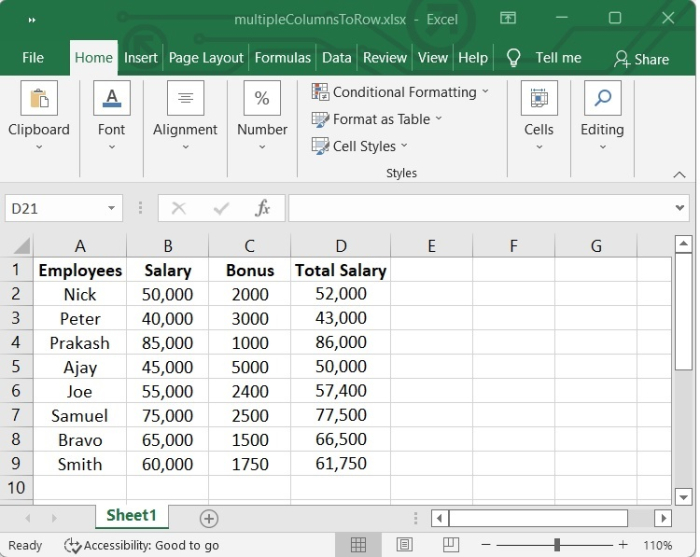
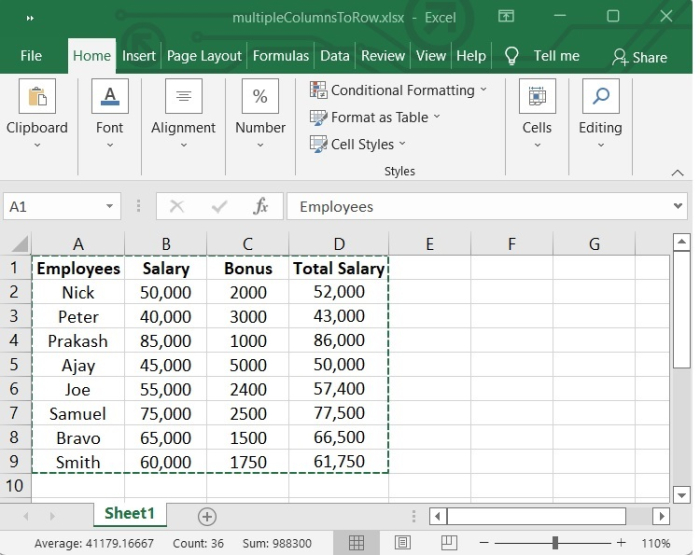
In our example, we have employee’s name, salary, bonus, and total salary in an Excel sheet in columnar format.
Step 2
The transpose function will switch the vertical range of your columns and the horizontal range of your rows.
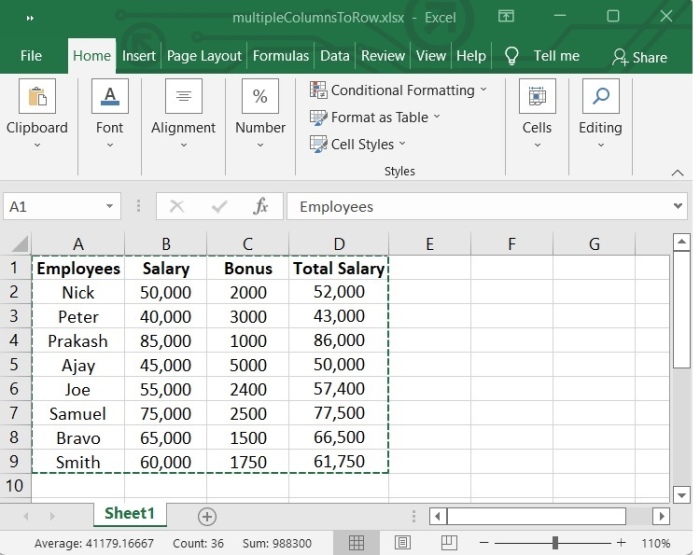
Here, select all the ranges of column to which you want to transpose and copy them by pressing CTRL+C.
Step 3
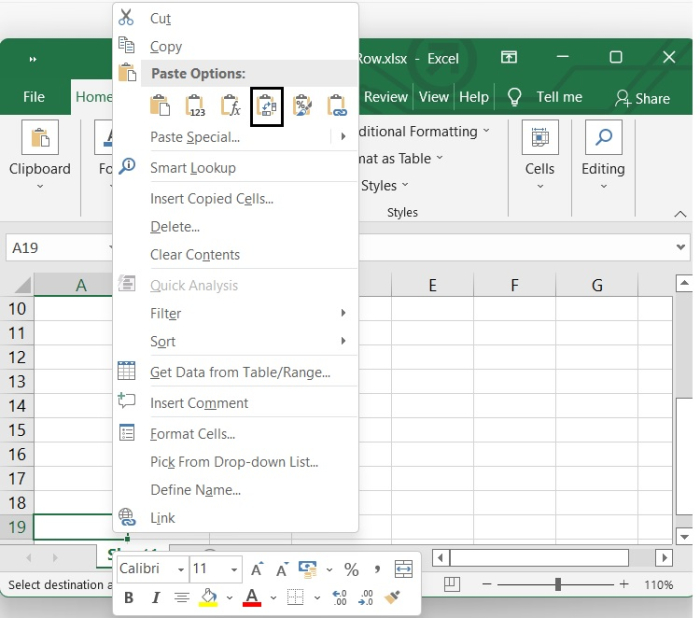
Now select a blank cell and right click there.
When you enable the right click button on the mouse, the option to paste will show from this menu, you will need to choose the fourth option, which is "Transpose." See the following image.
Step 4
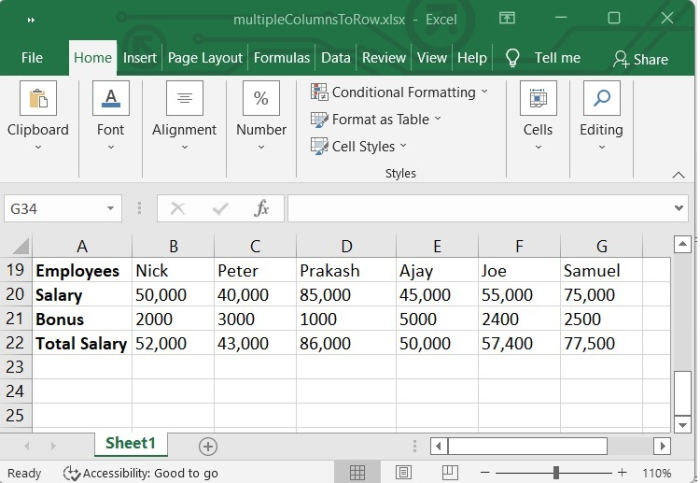
When you select the transpose option, a copy of your dataset is stored in that particular cell.
Using Transpose Function
Columns can be directly converted into rows by using the TRANSPOSE function, and vice versa. No matter how many columns there are or how wide the range is, we are able to use the TRANSPOSE function.
Step 1
You can copy the chosen cells by pressing the "Ctrl + C" keys simultaneously.
Choose the cell that you need to copy this data set into.
Step 2
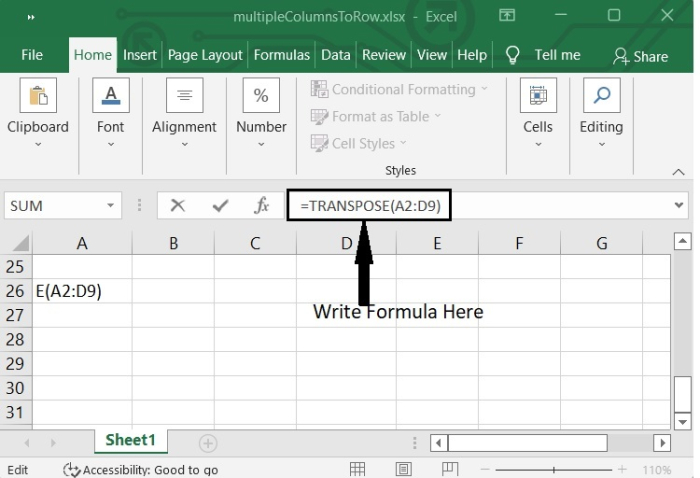
Now Select the cell in which you want to arrange the data set. Then add the following formula in formula bar.
=TRANSPOSE(A1:D9)
See the following image.
Step 3
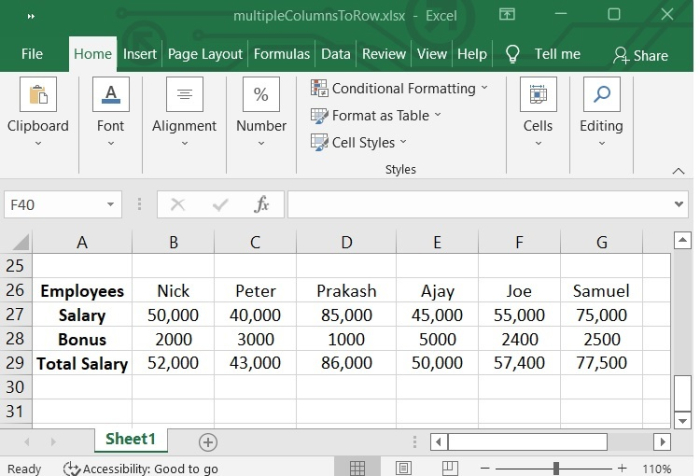
When you press the ENTER key, all of the columns will quickly transform into rows.
Conclusion
In this tutorial, we explained in detail how you can take multiple columns in Excel and transform them into rows.

