
Article Categories
- All Categories
-
 Data Structure
-
 Networking
-
 RDBMS
RDBMS
-
 Operating System
-
 Java
Java
-
 MS Excel
-
 iOS
iOS
-
 HTML
HTML
-
 CSS
CSS
-
 Android
-
 Python
-
 C Programming
-
 C++
C++
-
 C#
C#
-
 MongoDB
-
 MySQL
MySQL
-
 Javascript
-
 PHP
PHP
-
 Economics & Finance
How to Configure and Install ownCloud on Ubuntu 16.04
In this article, we will learn how to configure and install the ownCloud on Ubuntu 16.04. ownCloud is a file sharing server which permits the users to store the personal contents at a centralized storage or location just like Google Drive, Dropbox etc. The main difference is that ownCloud is a free and open source application can be configured in our own environment where we can control the data and secure them with limited access.
Prerequisites
- As we need the below environment to setup and configure the ownCloud.
- Ubuntu 16.04 installed with initial setup and with a user with sudo permission
- A LAMP (Linux, Apache, MySQL and PHP) is needed to be installed.
- An SSL certificate to secure the ownCloud site.
Installing the ownCloud on Ubuntu
By default, the ownCloud package is the availability with the Ubuntu default repositories, and ownCloud maintains their dedicated repository for the Ubuntu
To get the repository to the local machine, we need to run the below command –
$ curl https://download.owncloud.org/download/repositories/stable/Ubuntu_16.04/Release.key | sudo apt-key add –
% Total % Received % Xferd Average Speed Time Time Time Current
Dload Upload Total Spent Left Speed
0 0 0 0 0 0 0 0 --:--:-- --:--:-- --:--:-- 0
100 1358 100 1358 0 0 896 0 0:00:01 0:00:01 --:--:-- 895
OK
We will create a repository address in the source directory for apt
$ echo 'deb http://download.owncloud.org/download/repositories/stable/Ubuntu_16.04/ /' | sudo tee /etc/apt/sources.list.d/owncloud.list
$ deb http://download.owncloud.org/download/repositories/stable/Ubuntu_16.04/ /
After adding the new source, we will update the apt-get repository and will install the ownCloud packages.
$ sudo apt-get update
Hit:1 http://in.archive.ubuntu.com/ubuntu xenial InRelease
Hit:2 http://security.ubuntu.com/ubuntu xenial-security InRelease
Hit:3 http://in.archive.ubuntu.com/ubuntu xenial-updates InRelease
Ign:4 http://download.owncloud.org/download/repositories/stable/Ubuntu_16.04 In Release
Hit:5 http://in.archive.ubuntu.com/ubuntu xenial-backports InRelease
Get:6 http://download.owncloud.org/download/repositories/stable/Ubuntu_16.04 Re lease [984 B]
Get:7 http://download.owncloud.org/download/repositories/stable/Ubuntu_16.04 Re lease.gpg [481 B]
Get:8 http://download.owncloud.org/download/repositories/stable/Ubuntu_16.04 Pa ckages [1,611 B]
Fetched 3,076 B in 1s (1,982 B/s)
Reading package lists... Done
$ sudo apt-get install owncloud
After the installation of the packages, we need to restart the Apache server to make the changes to effect at the time of installation.
$ sudo systemctl restart apache2
Configuring the MySQL Database for ownCloud
As we needed to create separate database to ownCloud and provide access to the ownlcoud users
$ mysql -u root -p
Enter password:
Welcome to the MySQL monitor. Commands end with ; or \g.
Your MySQL connection id is 4
Server version: 5.7.13-0ubuntu0.16.04.2 (Ubuntu)
Copyright (c) 2000, 2016, Oracle and/or its affiliates. All rights reserved.
Oracle is a registered trademark of Oracle Corporation and/or its
affiliates. Other names may be trademarks of their respective
owners.
Type 'help;' or '\h' for help. Type '\c' to clear the current input statement.
mysql> CREATE DATABASE owncloud;
Query OK, 1 row affected (0.00 sec)
mysql> GRANT ALL ON owncloud.* to 'owncloud'@'localhost' IDENTIFIED BY 'password';
Query OK, 0 rows affected, 1 warning (0.00 sec)
Mysql> flush privileges;
Mysql> \q
Creating the Own SSL Certificate for the ownCloud
We will generate the SSL using the openssl and we will keep the SSL certificate in the /etc/ssl, Below is the command to generate the openssl certificates for the ownCloud –
$ sudo openssl req -x509 -nodes -days 365 -newkey rsa:2048 -keyout /etc/ssl/private/apache-selfsigned.key -out /etc/ssl/certs/apache-selfsigned.crt
Generating a 2048 bit RSA private key
.............................................................................................+++
..............................................................+++
Writing new private key to '/etc/ssl/private/apache-selfsigned.key'
-----
You are about to be asked to enter information that will be incorporated into your certificate request.
What you are about to enter is what is called a Distinguished Name or a DN.

There are quite a few fields but you can leave some blank
For some fields there will be a default value,
If you enter '.', the field will be left blank.
-----
Country Name (2 letter code) [AU]:IN
State or Province Name (full name) [Some-State]:Telengana
Locality Name (eg, city) []:Hyderabad
Organization Name (eg, company) [Internet Widgits Pty Ltd]:xxxx
Organizational Unit Name (eg, section) []:owncloud
Common Name (e.g. server FQDN or YOUR name) []:owncloud
Email Address []:admin@owncloud.com
Configuring the Apache SSL virtual host File for Owncloud
We will make a backup of the default-ssl.conf which is in the /etc/apache2/sites-available
$ sudo cp /etc/apache2/sites-available/default-ssl.conf /etc/apache2/sites-available/default-ssl.conf.bak
$ sudo vi /etc/apache2/sites-available/default-ssl.conf
<IfModule mod_ssl.c>
<VirtualHost _default_:443>
ServerAdmin owncloud.com
ServerName 192.168.1.117
DocumentRoot /var/www/owncloud
ErrorLog ${APACHE_LOG_DIR}/error.log
CustomLog ${APACHE_LOG_DIR}/access.log combined
SSLEngine on
SSLCertificateFile /etc/ssl/certs/apache-selfsigned.crt
SSLCertificateKeyFile /etc/ssl/private/apache-selfsigned.key
<FilesMatch "\.(cgi|shtml|phtml|php)$">
SSLOptions +StdEnvVars
</FilesMatch>
<Directory /usr/lib/cgi-bin>
SSLOptions +StdEnvVars
</Directory>
BrowserMatch "MSIE [2-6]" \
nokeepalive ssl-unclean-shutdown \
downgrade-1.0 force-response-1.0
</VirtualHost>
</IfModule>
Once the configuration is completed with SSL, we need to restart the apache to make the changes effect on the machine.
$ sudo systemctl restart apache2.service
Configuring the ownCloud
To configure the ownCloud we needed to go the site url, open any browser and type https://your-IP-Address/owncloud.
Here in my case https://192.168.1.117/owncloud
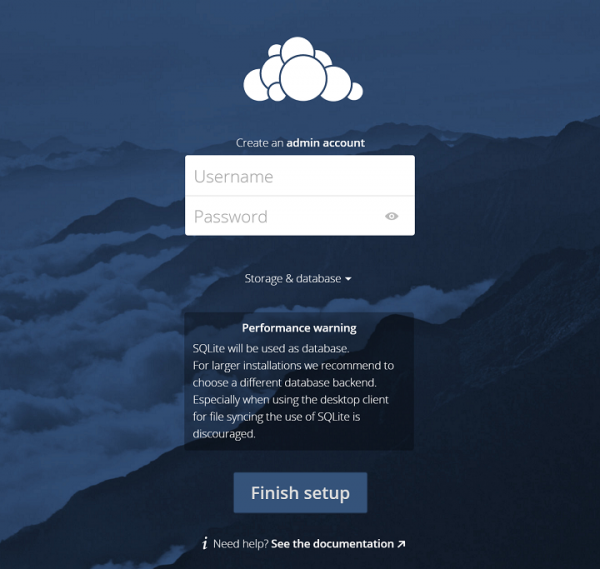
Here, first we need to create an Administrator account for this ownCloud.
Once we enter the user-name and password for the administrator account, we should click on the Storage and Database as mentioned below –
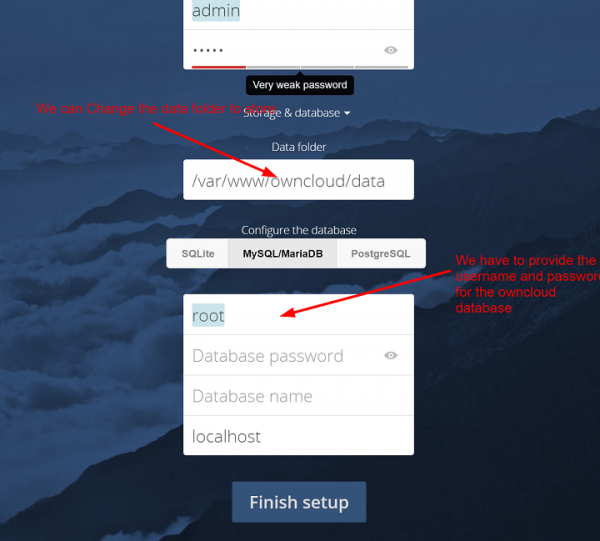
If we want to change the folder for the data uploaded by the client or users, we can change the database name here, and we also needed to provide the user name and password for the MySQL database to access, also we needed to provide the database name which we created in the previous steps.
Once we enter the configuration, we need to click on the ‘Finish setup’ button which is at the end of the screen.
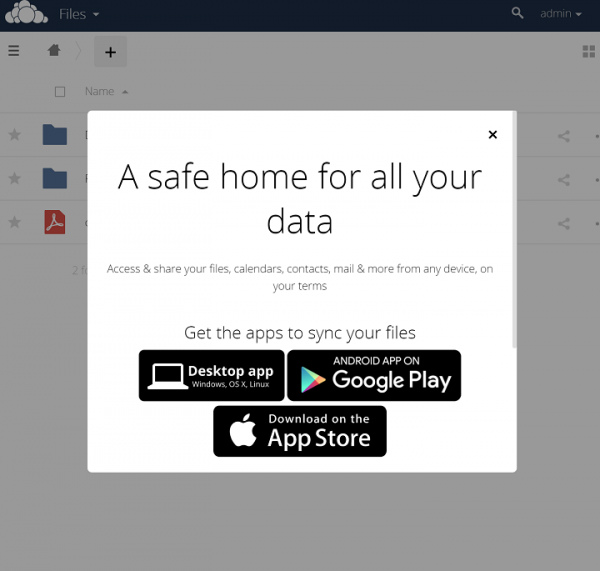
Once the configuration is completed, we can see a welcome splash screen.
Click on the X in the top corner of the splash screen we get the main interface.

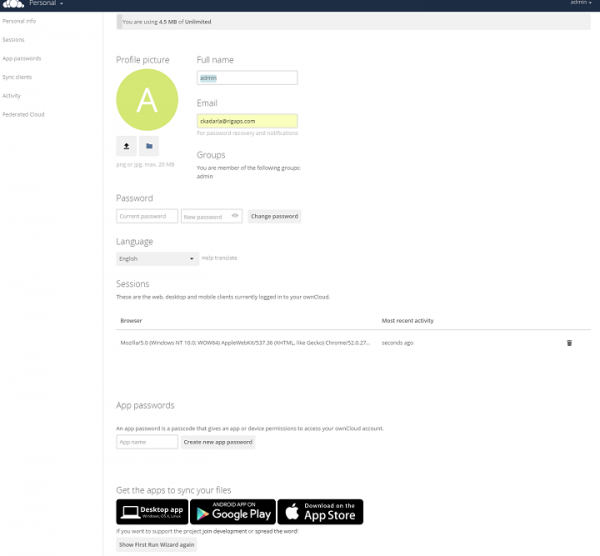
Click on the admin at the right-hand corner to setup the administrator options
CLICK on the Personal to setup the Full name of the administrator and also to setup the App Password which is used when a user access the ownCloud using the app from a device and this password will give permission to access the ownCloud account.
Creating Users for OwnCloud
Click on the Admin options in the right-hand corner of the screen and Click on the Users
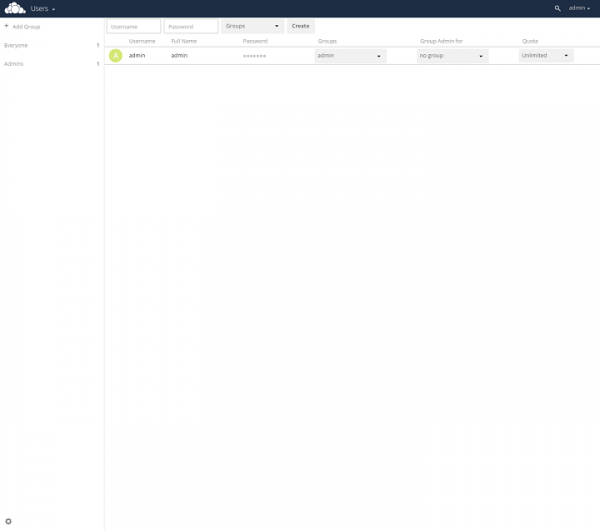
For more administration option, you can click on admin on right-hand corner and click on admin where you have many more options to set and secure your ownCloud.
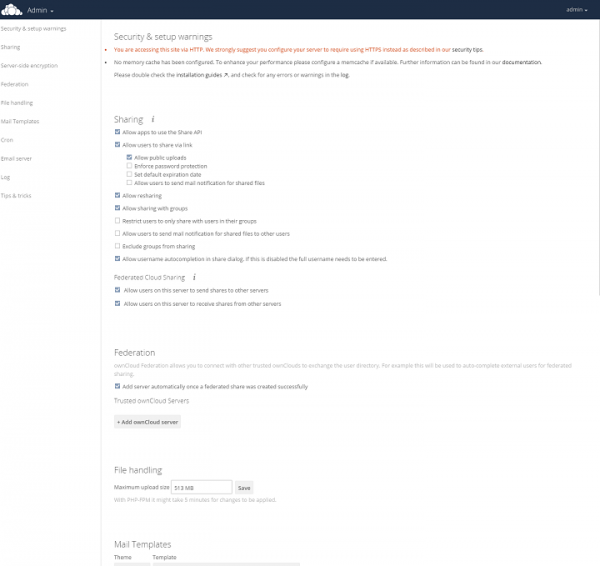
After this setup and configuration, we are now able to configure our own cloud on the Ubuntu 16.04. The main advantage of the ownCloud is that, we can secure the information and data which is stored in our own environment. We can also share the contents between the users with public URL’s also.

470 Views
