
Article Categories
- All Categories
-
 Data Structure
-
 Networking
-
 RDBMS
RDBMS
-
 Operating System
-
 Java
Java
-
 MS Excel
-
 iOS
iOS
-
 HTML
HTML
-
 CSS
CSS
-
 Android
-
 Python
-
 C Programming
-
 C++
C++
-
 C#
C#
-
 MongoDB
-
 MySQL
MySQL
-
 Javascript
-
 PHP
PHP
How to Build a Smart Contract in Blockchain?
A smart contract is nothing but a piece of code (computer program) that uses distributed ledger technology to follow the core principle of blockchain i.e distributed, trustless, and transparency. It is an immutable (Non- changeable) digital file having data and predefined code with an address on the network. That predefined code of conditions defined in the smart contract should be met and verified on specific event occurrences for smooth execution.
It follows the logic of If/else and do/while. It is used to automate the execution of programs to save time without using intermediaries.
It has various advantages over the conventional operations of the same executing process. Currently, smart contracts have multiple utilities but are mostly used in virtual currency transactions because of increasing demand in the Defi (decentralized Finance) world in a trustless manner with a minimum amount of transaction fee.
How to Create a Smart contract
Smart contracts are bound to the principle of blockchain protocol. To create a code for smart contract development we need certain components.
In this article, we are focusing on Ethereum-based Smart contract which uses
SolidityProgramming language to code for smart contracts.
-
A wallet for transaction purposes in a real-world transaction. Here Metamask we will use.
We can also use a few tools like Ganache and Truffle for it before doing real transactions for testing purposes to check whether our Smart contract is working as per our needs or not.
IDE for programming smart contracts. For Ethereum Remix IDE is available
We will understand these three Purposes with images in a step-by-step format. Let's get started.
First Stage ? Setup Metamask Wallet Account
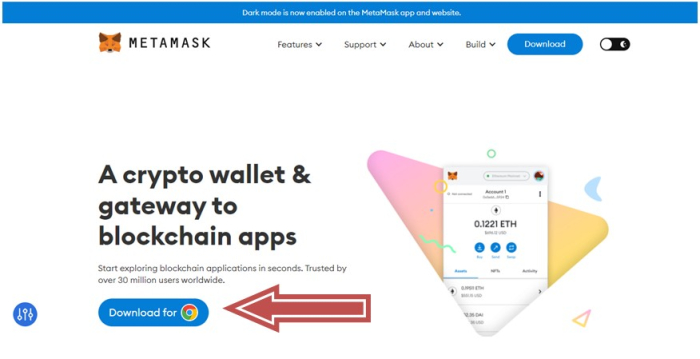
Step 1 ? Go to https://metamask.io/ or search Metamask on google and click on the Metamask official website and click on download for chrome.
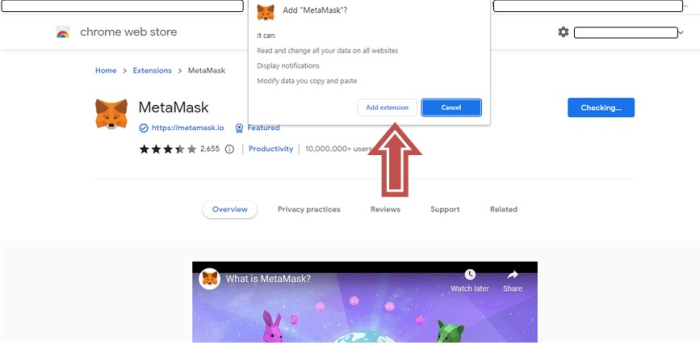
Step 2 ? When you click on download for chrome it takes you to a google extension page where you will be able to add an extension of the meta mask.
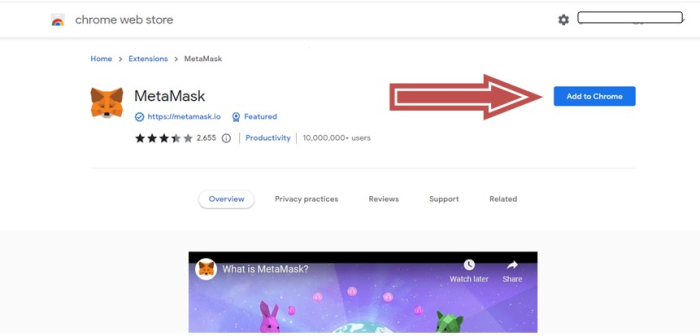
This extension gives you a user interface to interact with your wallet without the installation of software on your device.
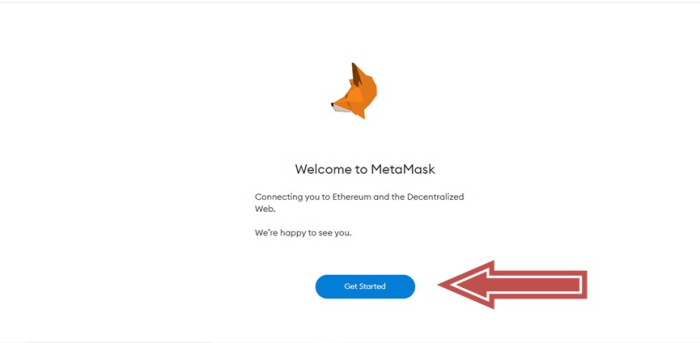
Step 3 ? Now that you have added the extension let?s Configure Your wallet by pressing the tab "Get Started".
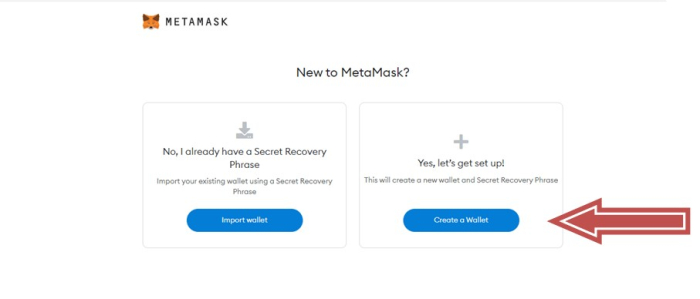
Step 4 ? Create a User Id or an account by the "Create Wallet" tab if you are new.
Otherwise, you can log into your existing account with the "Import Wallet" tab.
We are creating a new account to demonstrate account creation by clicking "Create Wallet".
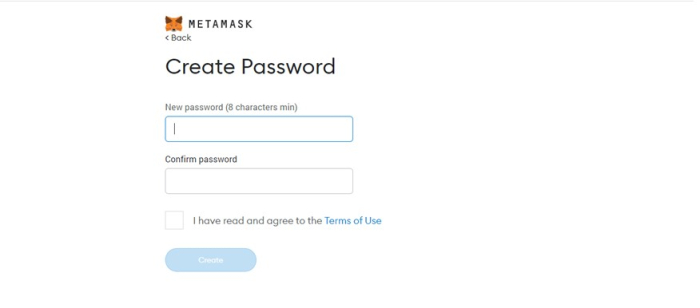
Step 5 ? Enter a new password and confirm the same password by entering it again. Once done click on the terms of use box and then click on Create.
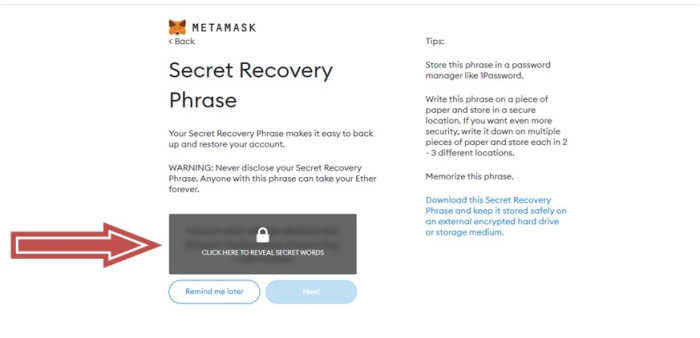
Step 6 ? Now a recovery phrase will be shown to your desktop which helps you in account recovery if you forget your credentials.
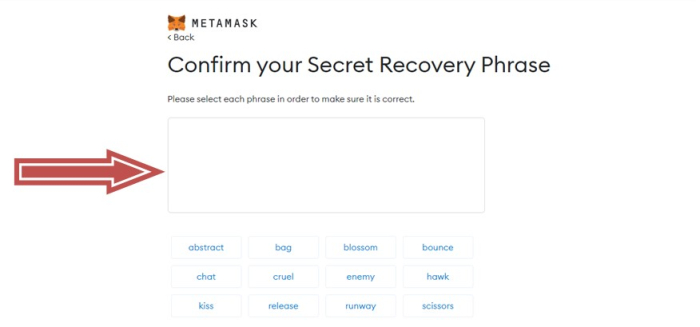
Step 7 ? Once you enter the recovery key for verification in the process of account creation you are good to go with your wallet setup.
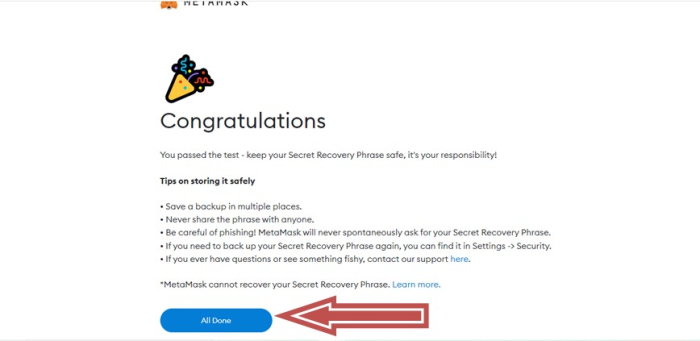
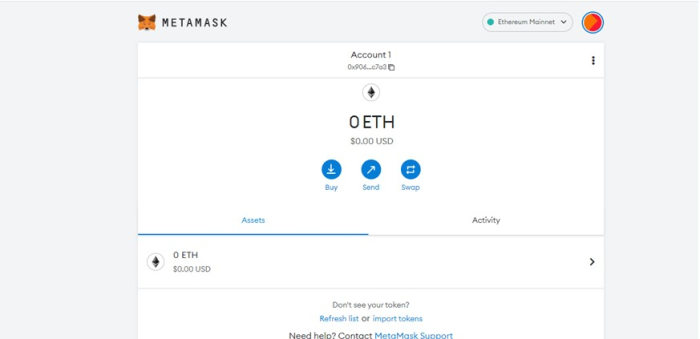
Step 8 ? Your wallet account has been created.
Second Stage ? Smart contract development
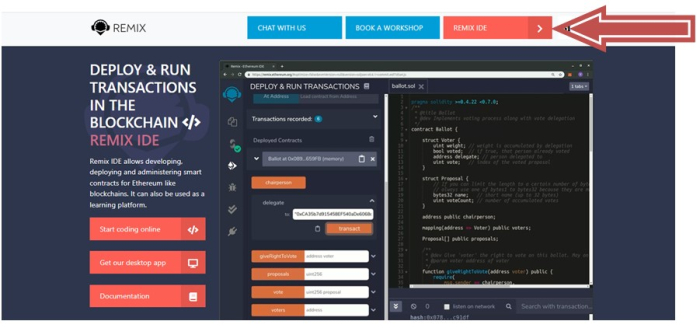
Step 1 ? Go to https://remix.ethereum.org/ or search Remix IDE on google and click on the Remix official website and follow the steps.
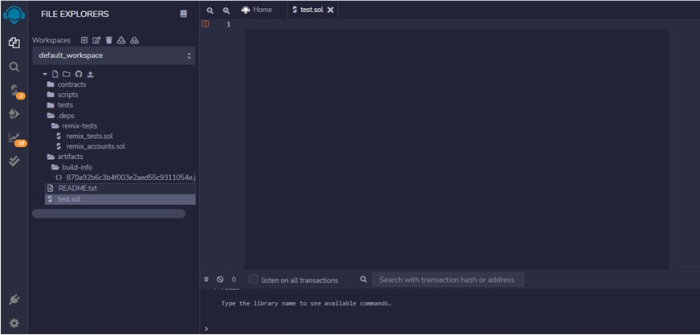
This is what the dashboard looks like
Step 2 ? Create a file by giving a tab on the dashboard "New File" with a name.
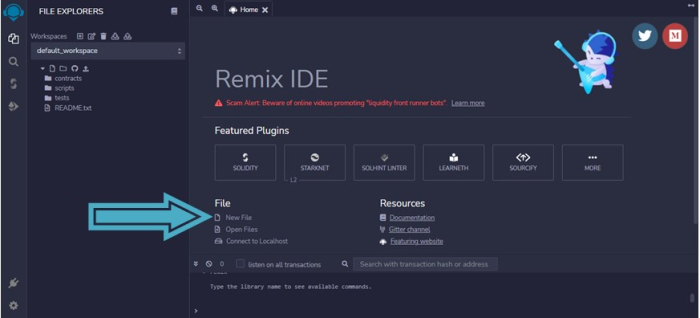
This is what it will look like when you select a new file from the dashboard ?
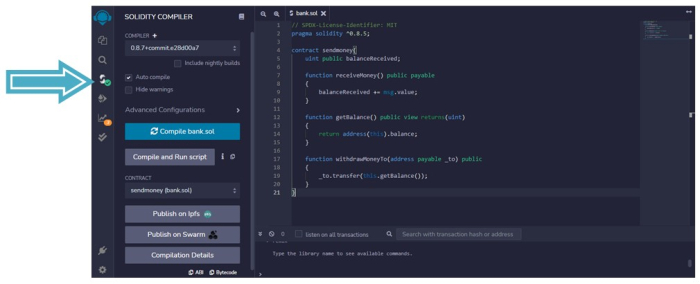
Note ? Every smart contract starts with the keyword "contracts" and has the same name as the file name.
Step 3 ? smart contract starts with "Pragma solidity" and the compiler's version number should be explicitly mentioned.
Step 4 ? once the coding part is done it has to be compiled. On the left bar Compiler Tab with an icon is mentioned.
Select the Environment as Javascript VM(London) as shown in the image below ?
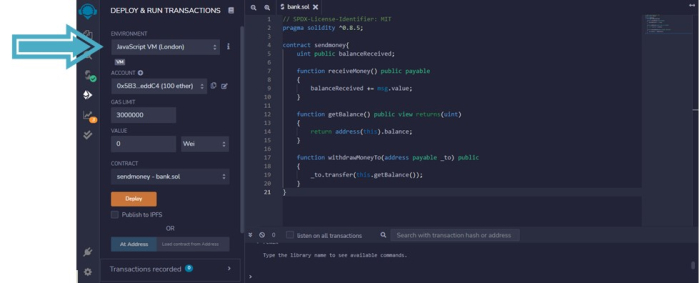
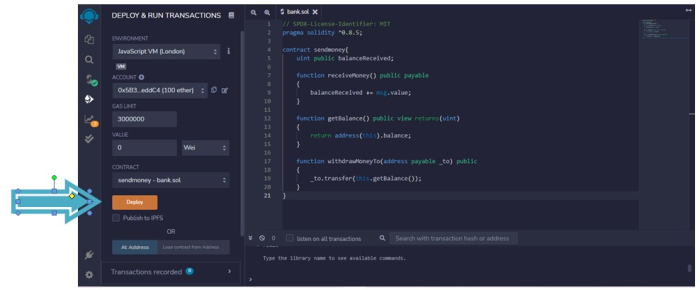
Step 5 ? After compilation, this smart contract should be deployed on the network to check properly by using the local network provided by Remix itself which uses a javascript-based internal browser-backed local network. Click on Deploy & Transaction.
Click on Deploy
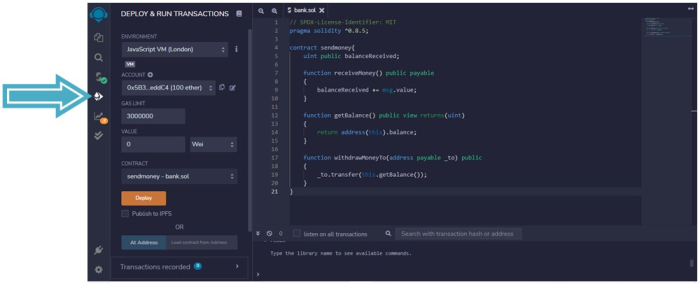
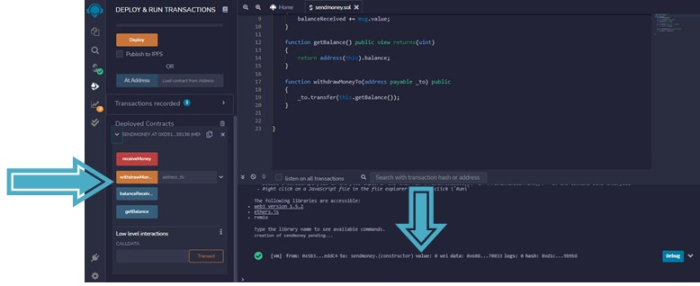
Once we deploy our contract we?ll get output on our terminal and we can also notice that some tokens have been also deducted from our account (Second Last Image). If we scroll down the left bar we also get our Event Tabs for the operation to transact between the different accounts which is nothing but the function we created in our smart contract program.
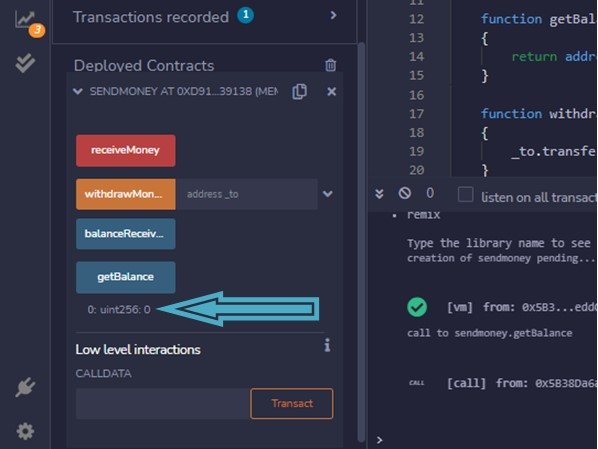
Currently, we are having "0" balance in our account, as we can see below
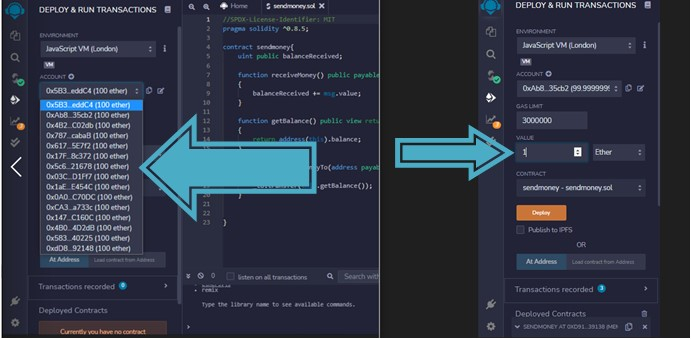
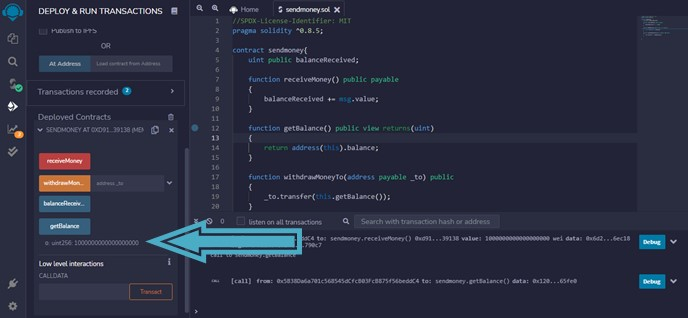
Step 6 ? To transact we need various accounts with different addresses that are provided by remix itself for initial development (Left image), we also mention "1" token (Ether) for the transaction (Right Image). Select any two accounts simultaneously to send and receive ethers.
Step 7 ? As soon as we clicked the functional tabs from the below image we got 1 Ether in our account after the complete transaction. Which we have seen with "0 Balance" earlier.
Conclusion
When we have to deploy it on Mainnet (Ethereum main network) by just changing the "Environment" of the contract using Remix IDE mentioned above in Step ? 4 (Image 2). That is all about how you could start smart contract development by just a simple method and integration of tools and setup environment for your computer suitable for blockchain development

427 Views
