
Article Categories
- All Categories
-
 Data Structure
-
 Networking
-
 RDBMS
RDBMS
-
 Operating System
-
 Java
Java
-
 MS Excel
-
 iOS
iOS
-
 HTML
HTML
-
 CSS
CSS
-
 Android
-
 Python
-
 C Programming
-
 C++
C++
-
 C#
C#
-
 MongoDB
-
 MySQL
MySQL
-
 Javascript
-
 PHP
PHP
-
 Economics & Finance
How to Auto-Centre a Checkbox in a Cell in Excel?
If you've ever tried to insert multiple checkboxes in Excel, you may have encountered difficulty arranging them in a logical order. It will be an irritating process to arrange the checkboxes in Excel, as they are placed very randomly. But using the VBA code, we can auto-centre the checkboxes easily. This tutorial will help you understand how you can auto-centre checkboxes in cells in Excel.
Auto-Centre Checkbox in a Cell in Excel
Here, we will first insert a VBA module and then run it to complete our task. Let us see a simple process to understand how we can auto-centre checkboxes in cells in Excel using the VBA application. Our process will include both active X and form control checkboxes. Both active X and form controllers are present under the developer option.
Step 1
Consider an Excel sheet with multiple checkboxes for active X and form control, as shown in the image below.

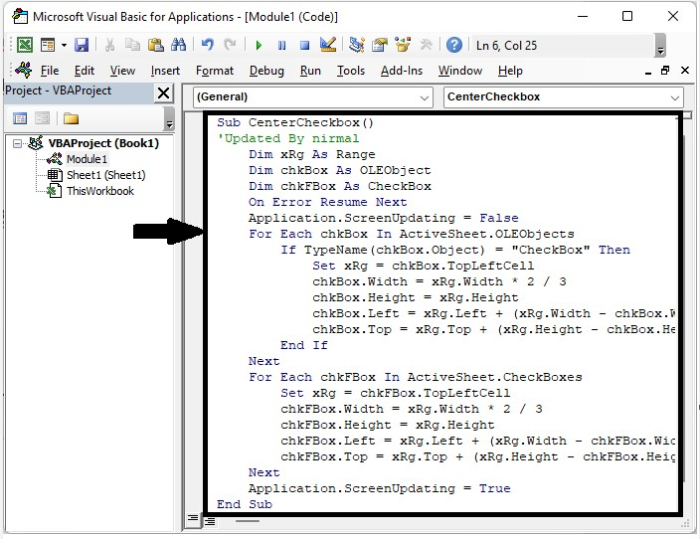
Now right-click on the sheet name and select view code to open the vba application, then click on Insert, Select Module, and type the programme into the textbox as shown in the below image.
Program
Sub CenterCheckbox()
'Updated By nirmal
   Dim xRg As Range
   Dim chkBox As OLEObject
   Dim chkFBox As CheckBox
   On Error Resume Next
   Application.ScreenUpdating = False
   For Each chkBox In ActiveSheet.OLEObjects
      If TypeName(chkBox.Object) = "CheckBox" Then
         Set xRg = chkBox.TopLeftCell
         chkBox.Width = xRg.Width * 2 / 3
         chkBox.Height = xRg.Height
         chkBox.Left = xRg.Left + (xRg.Width - chkBox.Width) / 2
         chkBox.Top = xRg.Top + (xRg.Height - chkBox.Height) / 2
      End If
   Next
   For Each chkFBox In ActiveSheet.CheckBoxes
      Set xRg = chkFBox.TopLeftCell
      chkFBox.Width = xRg.Width * 2 / 3
      chkFBox.Height = xRg.Height
      chkFBox.Left = xRg.Left + (xRg.Width - chkFBox.Width) / 2
      chkFBox.Top = xRg.Top + (xRg.Height - chkFBox.Height) / 2
   Next
   Application.ScreenUpdating = True
End Sub
Step 2
Now save the sheet as a macro-enabled template and click on F5 to run the code, and all the checkboxes in the sheet will be arranged in the centre as shown in the below image.

Conclusion
In this tutorial, we used a simple example to demonstrate how we can auto-centre a checkbox in a cell in Excel.

3K+ Views
