
Article Categories
- All Categories
-
 Data Structure
-
 Networking
-
 RDBMS
RDBMS
-
 Operating System
-
 Java
Java
-
 MS Excel
-
 iOS
iOS
-
 HTML
HTML
-
 CSS
CSS
-
 Android
-
 Python
-
 C Programming
-
 C++
C++
-
 C#
C#
-
 MongoDB
-
 MySQL
MySQL
-
 Javascript
-
 PHP
PHP
-
 Economics & Finance
How to Add or Subtract Weeks to a Date in Excel?
Making changes to deadlines in Excel is one of the most common tasks performed there. Making the adjustments to the dates manually is a very complex and hectic process. We can make it happen very easily, using the formulas supported by Excel. So, let's see a simple process to add or subtract the number of weeks in the Excel sheet using the formula.
Adding Weeks to a Date
Here, we will first use the formula to get the first result, then use the auto-fill handler to get all the results. Let's look at a simple procedure for adding weeks to a date in Excel.
Step 1
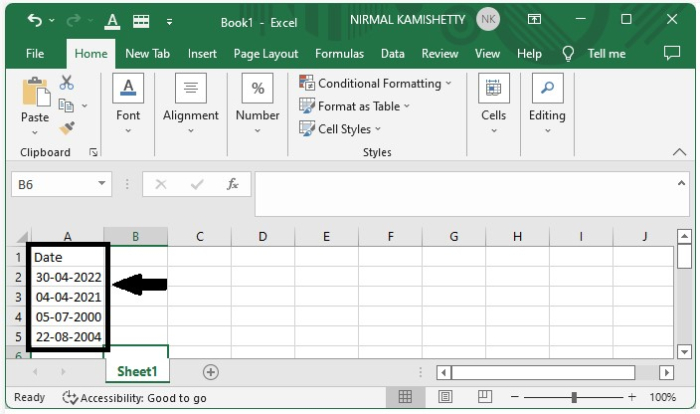
Let's make an Excel sheet with a single column containing a list of dates.
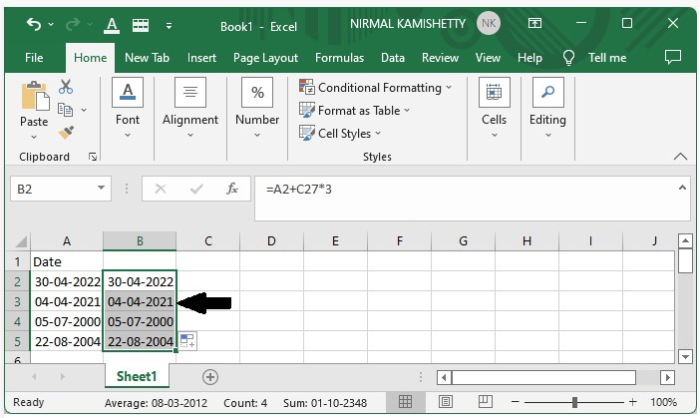
Now click on an empty cell beside the date and enter the formula =A2+7*3 to add two weeks to the date, then click on Enter to get the first result.

Step 2
We can create all the other results by dragging down from the right corner of the first result until all the other results are acquired.
Subtracting Weeks from a Date
Here, we will first use the formula to get the first result, then use the auto-fill handler to get all the results. Now let us see the simple process for subtracting weeks from the date.
Step 1
Let us consider the same data that we used in the addition of weeks, which is the data used in the above example.
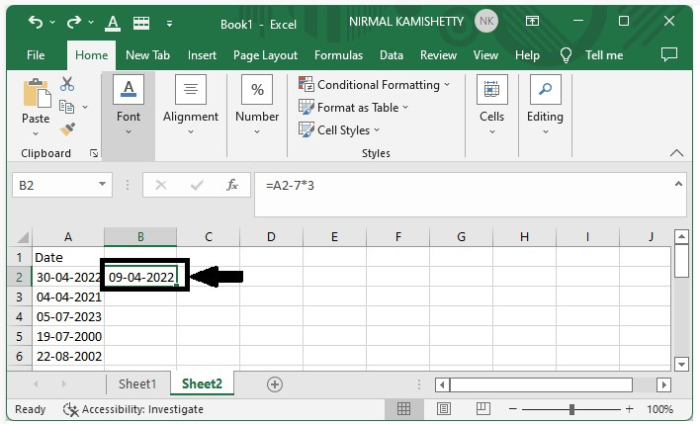
To subtract three weeks, click on an empty cell in Excel and enter the formula =A2-7*3.
Step 2
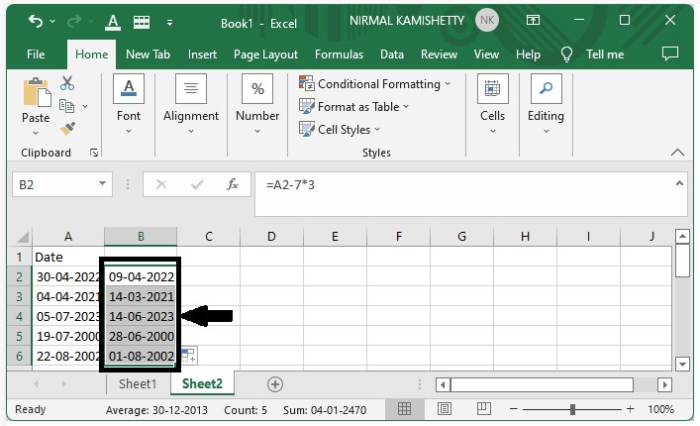
Now we can get all the other results by dragging down from the right corner of the first result to get our final output.
Conclusion
In this tutorial, we used a simple example to demonstrate how we can add or subtract weeks from a date in Excel to highlight a particular set of data.

26K+ Views
