
 Data Structure
 Networking
 RDBMS
RDBMS Operating System
 Java
Java MS Excel
 iOS
iOS HTML
HTML CSS
CSS Android
 Python
 C Programming
 C++
C++ C#
C# MongoDB
 MySQL
MySQL Javascript
 PHP
PHP
- Selected Reading
- UPSC IAS Exams Notes
- Developer's Best Practices
- Questions and Answers
- Effective Resume Writing
- HR Interview Questions
- Computer Glossary
- Who is Who
Adding 3D Objects in Flutter
What are 3D Objects in Flutter?
3D objects are like 3 dimensional objects which we display within our application for animating the images. The image which we display in the form of a 3D object we can rotate it 3 dimensionally to view it.
Implementation 3D Objects in Flutter
We will be creating a simple application in which we will be displaying a text view and a simple 3D object within our android application. We will be following a step by step guide to implement a toast message in an android application.
Step 1 ? Creating a new flutter project in Android Studio.
Navigate to Android studio as shown in below screen. In the below screen click on New Project to create a new Flutter Project.
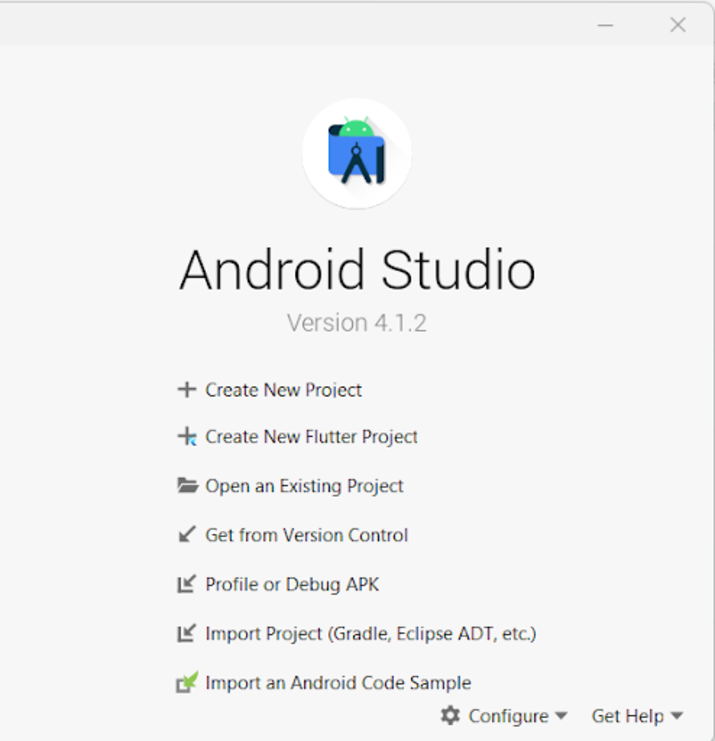
After clicking on New Project you will get to see the below screen.
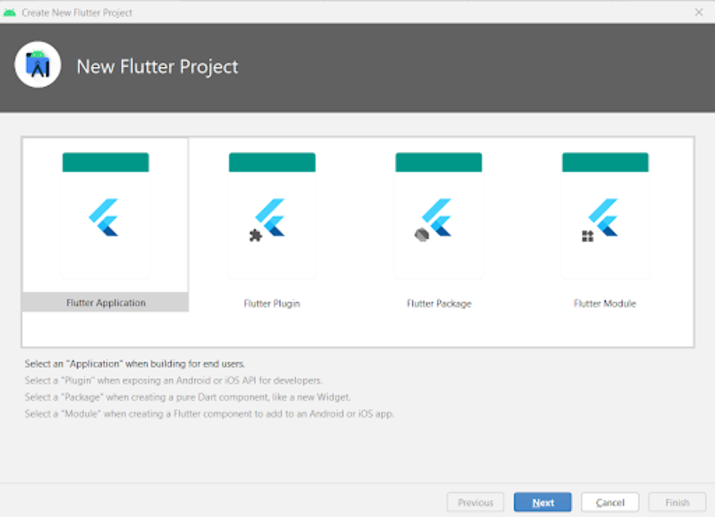
Inside this screen you have to select Flutter Application and then click on Next you will get to see the below screen.
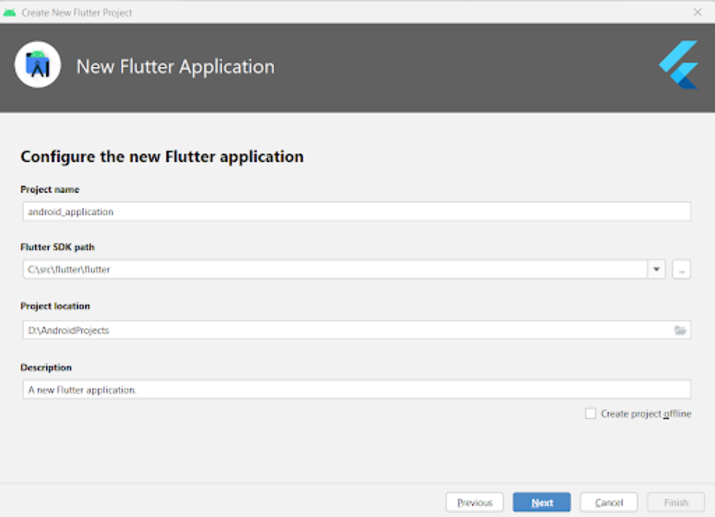
Inside this screen you have to specify the project name and then simply click on Next to
Step 2 ? Adding 3D Image in your project.
Download the 3D image from this link and navigate to your flutter project. Right click on project root directory>New>Directory and name it as assets. Copy the downloaded folder for the asset and add that paste that asset in your assets folder.
Step 3 : Working with pubspec.yaml file.
Add the dependency of flutter cube in pubspec.yaml file in dev_dependencies section. Along with that add the assets in the pubspec.yaml file. Below is the code for it.
dev_dependencies:
flutter_test:
sdk: flutter

# The "flutter_lints" package below contains a set of recommended lints to
# encourage good coding practices. The lint set provided by the package is
# activated in the `analysis_options.yaml` file located at the root of your
# package. See that file for information about deactivating specific lint
# rules and activating additional ones.
flutter_lints: ^1.0.0
flutter_cube: ^0.0.6

# For information on the generic Dart part of this file, see the
# following page: https://dart.dev/tools/pub/pubspec

# The following section is specific to Flutter.
flutter:

# The following line ensures that the Material Icons font is
# included with your application, so that you can use the icons in
# the material Icons class.
uses-material-design: true
assets:
- assets/earth/
After adding the above code simply click on Pub get to install all the dependencies within your project.
Step 4 ? Working with main.dart file.
Navigate to your project>lib>main.dart file and add below code to it. Comments are added in the code to get to know in detail.
Syntax
import 'package:flutter/material.dart';
import 'package:flutter/rendering.dart';
import 'package:flutter_cube/flutter_cube.dart';

void main() {
   runApp(const MyApp());
}

class MyApp extends StatelessWidget {
   const MyApp({Key? key}) : super(key: key);

   // This widget is the root of your application.
   @override
   Widget build(BuildContext context) {
      return MaterialApp(

         // on below line specifying title.
         title: 'Flutter Demo',

         // on below line hiding our debug banner
         debugShowCheckedModeBanner: false,

         // on below line setting theme.
         theme: ThemeData(
            primarySwatch: Colors.blue,
         ),

         // on below line displaying home page
         home: const MyHomePage(),
      );
   }
}

class MyHomePage extends StatefulWidget {
   const MyHomePage({Key? key}) : super(key: key);

   @override
   State<MyHomePage> createState() => _MyHomePageState();
}
class _MyHomePageState extends State<MyHomePage> {

   // on below line creating an object for earth
   late Object earth;

   // on below line initializing state
   @override
   void initState() {

      // on below line initializing earth object
      earth = Object(fileName: "assets/earth/earth_ball.obj");
      super.initState();
   }

   @override
   Widget build(BuildContext context) {

      // on below line creating our UI.
      return Scaffold(

         // on below line creating a center widget.
         body: Center(

            // on below line creating a column
            child: Column(

               // on below line specifying alignment
               mainAxisAlignment: MainAxisAlignment.center,
               crossAxisAlignment: CrossAxisAlignment.center,
               children: [

                  // on below line adding a sized box
                  const SizedBox(
                     height: 100,
                  ),

                  // on below line adding a text for displaying a text for heading.
                  const Text(

                     // on below line specifying text message
                     "3D Objects in Flutter",

                     // on below line specifying text style
                     style: TextStyle(fontWeight: FontWeight.bold, fontSize: 20),
                  ),

                  // on below line adding a sized box
                  const SizedBox(
                     height: 20,
                  ),

                  // on below line creating an expanded widget for displaying an earth
                  Expanded(

                     // on below line creating a cube
                     child: Cube(

                        // on below line creating a scene
                        onSceneCreated: (Scene scene) {

                           // on below line adding a scene as earth
                           scene.world.add(earth);

                           // on below line setting camera for zoom.
                           scene.camera.zoom = 5;
                        },
                     ),
                  ),
               ],
            ),
         ),
      );
   }
}
Explanation
In the above code we can get to see the main method inside which we are calling our MyApp class which we are creating below as a stateless widget. Inside this stateless widget we are creating a build method inside which we are returning our material app. Inside the material app we are specifying the app title, app theme, home page which we have to display along with the debug check mode banner as false.
After that we are creating a Home Page state method which will extend the state of Home Page. Inside this Home Page method we are creating a variable for Object named earth. Then we are creating an initState method inside which we are initializing our earth variable with the path of the file which we have added in our assets folder.
After that we are creating a build method inside which we are specifying a body to center and then inside this body we are creating a column inside which we are specifying cross axis and main axis alignment to align the view to the center. After that we are creating children and inside this we will be creating our widgets. Firstly we are creating a sized box to add a margin from top. After that we are creating a Text widget to simply display a text for the app name. After that again we are adding a sized box to add a spacing. Then we are adding an Expanded widget to display our 3D object.
Inside this expanded widget we are adding a child as Cube. Inside this cube we are adding onScene created inside which we are setting our scene as earth and camera zoom to 5.
After adding the above code now we have to simply click on the green icon in the top bar to run our application on a mobile device.
Note ? Make sure you are connected to your real device or emulator.
Output
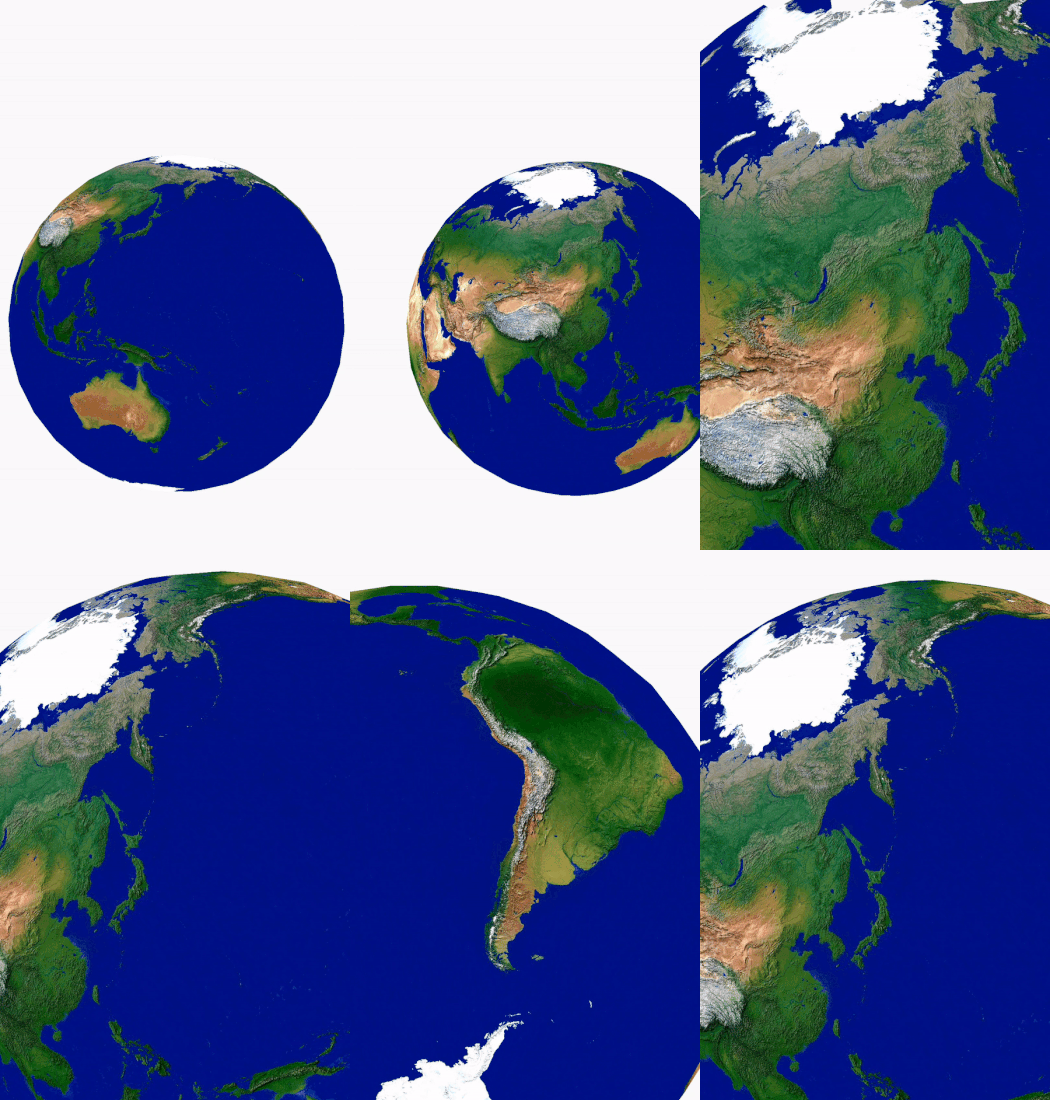
Conclusion
In the above tutorial, we learn What are 3D objects in Flutter and How we can add 3D object inside our application and use it.

