 Data Structure
 Networking
 RDBMS
RDBMS Operating System
 Java
Java MS Excel
 iOS
iOS HTML
HTML CSS
CSS Android
 Python
 C Programming
 C++
C++ C#
C# MongoDB
 MySQL
MySQL Javascript
 PHP
PHP
- Selected Reading
- UPSC IAS Exams Notes
- Developer's Best Practices
- Questions and Answers
- Effective Resume Writing
- HR Interview Questions
- Computer Glossary
- Who is Who
Getting Started with C++ in Visual Studio
In this article, you will learn the setup to build and compile the C++ code in Visual Studio. Here you will become familiar with many of the tools and dialog boxes that you can use when you develop applications in C++. In this, we'll create a "Hello, World" style console application to help you learn more about working in this IDE.
Prerequisites
For this, you need a copy of Visual Studio 2017 version 15.3 or later, with the Desktop development with C++ workload installed. You can follow this guide to see the full installation procedure of Visual Studio [Link].
Create a console app
- Start Visual Studio
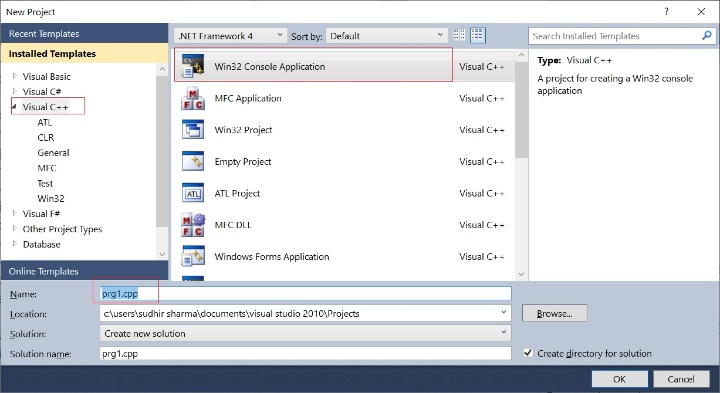
- To create a console app project, choose File > New > Project to open the New Project dialog box.
- In the New Project dialog, select Installed > Visual C++.
- In the center pane, select the Windows Console Application template (Win32 console application).
- Then, in the Name edit box, enter prg1.cpp (you can keep any file name according to your preference)
-
Note: If you don't see Visual C++ project templates, you need to run the Visual Studio installer again and install the Desktop development with C++ workload. You can do this directly from the New Project dialog.
- Choose the OK button to create your app project and solution.


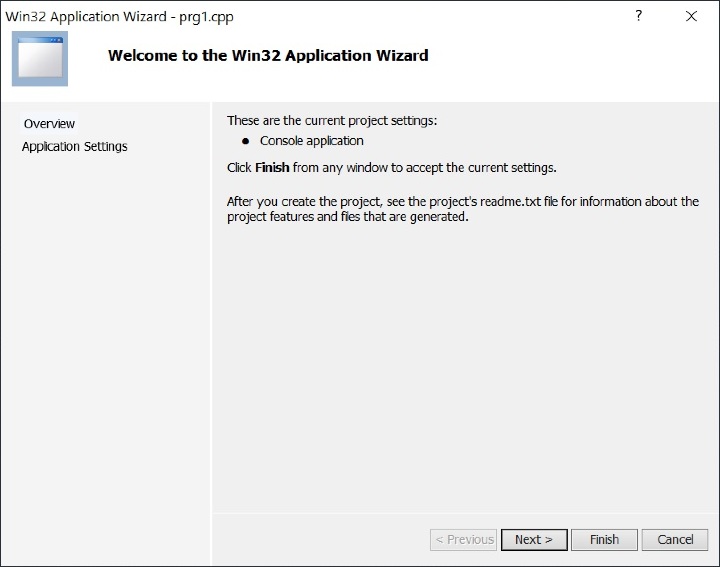
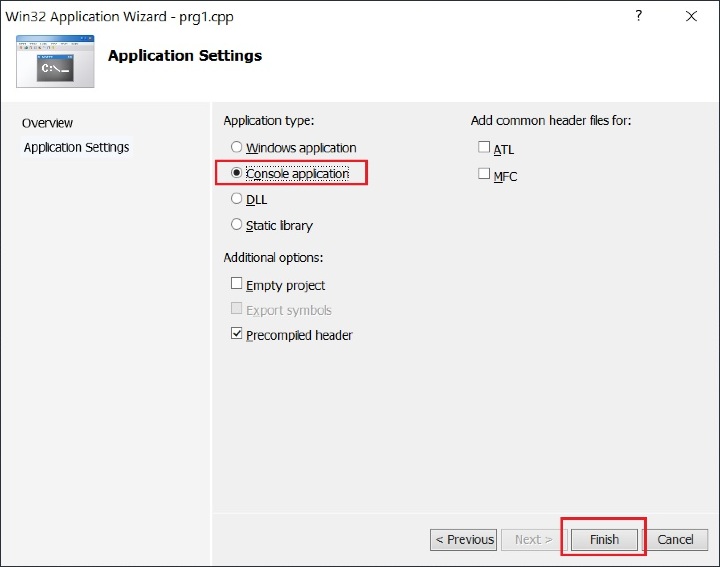
- After clicking Next, choose the console application and click Finish to complete.

Add your code
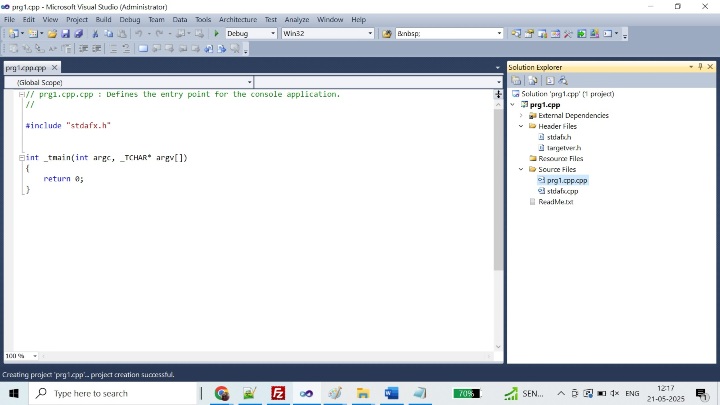
- The prg1.cpp file will open in the code editor. On the left, you can also see the solution explorer, and you will have some amount of default code written in it.
See the default code window with some Visual studio generated code:

- Now in the code, add#include<iostream> a header file above.
- And add std:: << "Hello, World!" << std::endl; before return 0;.
- Save the changes to this file and project using Ctrl + S.
Here is the code to print "Hello World" in C++ using Visual Studio:
// prg1.cpp.cpp : Defines the entry point for // the console application. #include "stdafx.h" #includeint _tmain(int argc, _TCHAR* argv[]) { std::cout << "Hello, World!" << std::endl; return 0; }
Build Your Application
For this, go to the menu bar, choose Build > Build Solution. Visual Studio builds the prg1 solution, and reports progress in the Output window at the bottom.
Debug and test your Application
Once your solution is built(or, in C++ speak, compiled), you can debug it to see whether Hello appears in the output console.
- To start the debugger, choose Debug > Start Debugging on the menu bar.
- The debugger starts and runs the code. The console window (a separate window that looks like a command prompt) appears for a few seconds but closes quickly when the debugger stops running. To see the text, you need to set a breakpoint to stop program execution.
- To add a breakpoint in your program, click in the left margin to set a breakpoint on the return 0; line.
- Debug the app again using F5(shortcut). You'll see the output of your code. To stop debugging, press Shift + F5.
For a more detailed guide, you can follow this official site [Link]

