- WPF - Home
- WPF - Overview
- WPF - Environment Setup
- WPF - Hello World
- WPF - XAML Overview
- WPF - Elements Tree
- WPF - Dependency Properties
- WPF - Routed Events
- WPF - Controls
- WPF - Layouts
- WPF - Nesting Of Layout
- WPF - Input
- WPF - Command Line
- WPF - Data Binding
- WPF - Resources
- WPF - Templates
- WPF - Styles
- WPF - Triggers
- WPF - Debugging
- WPF - Custom Controls
- WPF - Exception Handling
- WPF - Localization
- WPF - Interaction
- WPF - 2D Graphics
- WPF - 3D Graphics
- WPF - Multimedia
WPF - RoutedCommands
RoutedCommands enable input handling at a more semantic level. These are actually simple instructions as New, Open, Copy, Cut, and Save. These commands are very useful and they can be accessed from a Menu or from a keyboard shortcut. It disables the controls if the command becomes unavailable. The following example defines the commands for Menu items.
Lets create a new WPF project with the name WPFCommandsInput.
Drag a menu control to a stack panel and set the following properties and commands as shown in the following XAML file.
<Window x:Class = "WPFContextMenu.MainWindow"
   xmlns = "http://schemas.microsoft.com/winfx/2006/xaml/presentation"
   xmlns:x = "http://schemas.microsoft.com/winfx/2006/xaml"
   xmlns:d = "http://schemas.microsoft.com/expression/blend/2008"
   xmlns:mc = "http://schemas.openxmlformats.org/markup-compatibility/2006"
   xmlns:local = "clr-namespace:WPFContextMenu"
   mc:Ignorable = "d" Title = "MainWindow" Height = "350" Width = "525">

   <Grid>
      <StackPanel x:Name = "stack" Background = "Transparent">

         <StackPanel.ContextMenu>
            <ContextMenu>
               <MenuItem Header = "New" Command = "New" />
               <MenuItem Header = "Open" Command = "Open" />
               <MenuItem Header = "Save" Command = "Save" />
            </ContextMenu>
         </StackPanel.ContextMenu>

         <Menu>
            <MenuItem Header = "File" >
               <MenuItem Header = "New" Command = "New" />
               <MenuItem Header = "Open" Command = "Open" />
               <MenuItem Header = "Save" Command = "Save" />
            </MenuItem>
         </Menu>

      </StackPanel>
   </Grid>

</Window>
Here is the C# code in which different commands are handled.
using System.Windows;
using System.Windows.Input;
namespace WPFContextMenu {
/// <summary>
/// Interaction logic for MainWindow.xaml
/// </summary>
public partial class MainWindow : Window {
public MainWindow() {
InitializeComponent();
CommandBindings.Add(new CommandBinding(ApplicationCommands.New, NewExecuted, CanNew));
CommandBindings.Add(new CommandBinding(ApplicationCommands.Open, OpenExecuted, CanOpen));
CommandBindings.Add(new CommandBinding(ApplicationCommands.Save, SaveExecuted, CanSave));
}
private void NewExecuted(object sender, ExecutedRoutedEventArgs e) {
MessageBox.Show("You want to create new file.");
}
private void CanNew(object sender, CanExecuteRoutedEventArgs e) {
e.CanExecute = true;
}
private void OpenExecuted(object sender, ExecutedRoutedEventArgs e) {
MessageBox.Show("You want to open existing file.");
}
private void CanOpen(object sender, CanExecuteRoutedEventArgs e) {
e.CanExecute = true;
}
private void SaveExecuted(object sender, ExecutedRoutedEventArgs e) {
MessageBox.Show("You want to save a file.");
}
private void CanSave(object sender, CanExecuteRoutedEventArgs e) {
e.CanExecute = true;
}
}
}
When the above code is compiled and executed, it will produce the following window −
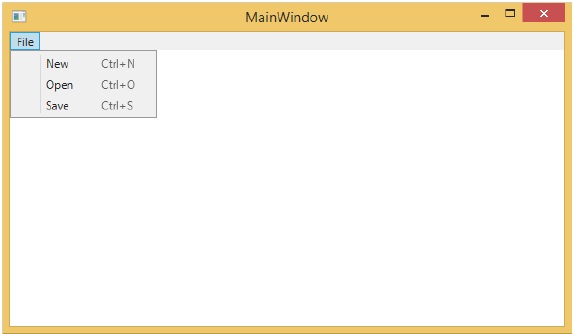
Now you can access this menu items, either from the menu or from the shortcut keys commands. From either option, it will execute the commands.